5 tips for styling your shelves
What is it about bare, open shelves that freaks us out so much? For starters, they’re usually the focal point in a room. No pressure. Will they hold books, family photos or a curated collection of travel treasures (or all of the above)?
Before you dive in, follow these helpful tips to create a functional and beautiful displayed shelf – without it looking like a cluttered mess. When you're done, your #shelfies will look amazing, we promise.
Open shelf life

Open shelves are more than just a catchall for stuff you need to stash. They’re for showing off cherished things, pieces that bring you joy and favourite books that need a place to live. They can be chic and eclectic, or layered and sophisticated. And most of all, they can tell your story.
But making it look interesting and pulled together can be a daunting task – and if you live in a smaller house, it’s also about making the most of limited space. That’s where the experts come in.
Stylist Emily Henderson suggests a couple of universal rules that apply to any surface or room in your home before you get started:
1. Have a clear and consistent colour palette
2. Edit out what you don’t need or like
a. Is it functional?
b. Is it sentimental?
c. Is it beautiful?
If you answered no to any of the above, ditch it or donate it. It’s that simple.
Another great idea before you start placing things is to paint the backs of the shelving unit (whether freestanding or built-in) to carry your colour scheme through and give the room a sense of unity with the rest of your home. You can also use peel-and-stick wallpaper to make a statement that looks professional without fully committing.
Tip 1: Gather everything together

Now that you’ve weeded out the so-so things and have a nice gathering of books, photos or art, baskets, boxes, trays, greenery and objects, it’s time to start creating an eye-catching display.
You’ll likely have an assortment of sizes to work with – from oversized books to tiny trinkets from your travels – so it’s a good idea to gather more than you think you need and lay them all on the floor so you can easily see what you’re working with. Some stylists suggest organizing items by size, but we prefer a more random approach so you can begin to see what shapes and sizes work well together.
Need inspiration to get started? This video from Studio McGee shows you step-by-step how to turn your shelves from blah to aha!
Tip 2: Start with larger items

Image Credit: Emily Henderson
Larger vases, boxes, objects and such are going to take up the most space and will be tricky to fit in later. So start with your biggest piece and place it anywhere that feels right. This is now your anchor and will be what catches the eye.
Continue with peppering any other sizable items throughout the shelves, keeping in mind there are no set-in-stone rules here. Place them on every other shelf – some centred, some off to the right or left. It’s all about balance, so this means you’ll likely have to step back, take a look, and fiddle with things until it feels right.
If you have similar shaped items and colours, you’ll want to stagger these to help create visual interest. Or instead, you might choose to create groupings of vases or candlesticks of varying heights and materials (think pottery, glass, wood and metal) that also look perfectly styled.
Tip 3: Add and organize your books

Image: Taken at Kips Bay Decorator Show House 2019
Next, add in all the coffee table books, travel magazines and your National Geographic collection that you’ve been saving for the perfect spot. Tada! Today’s your day.
Create neat, horizontal stacks of 2-4 books high that can act as little platforms for other objects, and lean vertical rows to add height. And unless you’re going for a single colour story, try mixing colours or ordering them to make a rainbow (big Instagram trend right now!). For example, instead of all black books clustered together, mix black, green, yellow, white – you name it. And just like that you have an eclectic design feature.
- Inside tip: Remove torn or dirty book jackets! Uncovered books often look more classic.
You might also consider turning your books backwards with the spine facing inward, so all you see are the raw pages for a “cool without trying too hard” vibe. Now, according to Apartment Therapy, this is a trend that decorators, stylists and people in general are pretty divided on. Some argue it’s a great way to hide wear and tear of cherished volumes while incorporating a neutral design element. Others say it’s just plain weird, and wonder “how will you find your books?”. Both valid points, so go with whatever trend you’re feeling – or not.
Don’t forget bookends, which can add a touch of whimsy or sophistication while helping to keep things tidy (and upright). Feeling crafty? Better Homes & Gardens has some great DIY suggestions you can make!
Tip 4: Incorporate artwork and framed photos
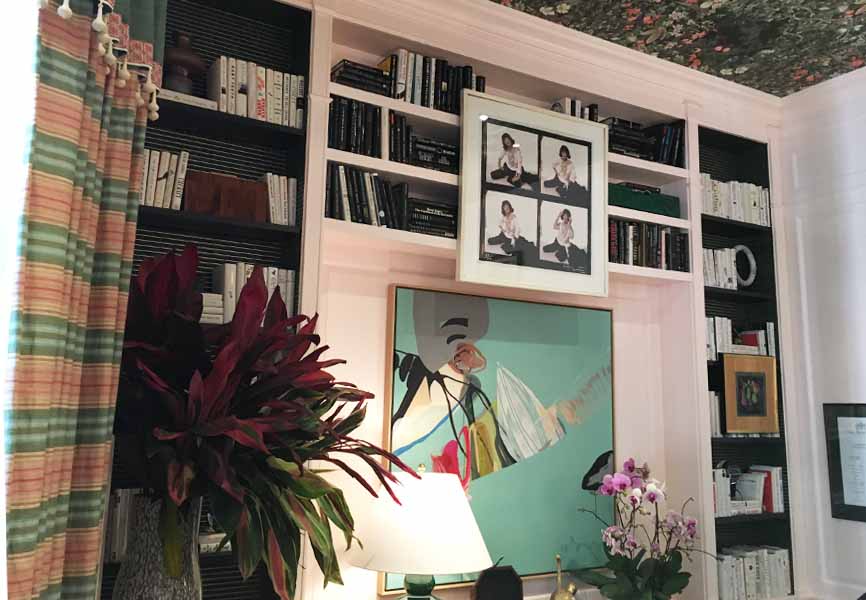
Image: Taken at Kips Bay Decorator Show House 2019
Now it’s time to layer in artwork and framed photos. West Elm suggests leaning small painting toward the back of the shelves behind other objects to create depth and pattern and choosing pieces that truly speak to your heart.
This is where your personality shines through, as art is one of the most personal purchases you can make. Framed photographs also offer a glimpse into life through your eyes (and the people in it), so we like to consider this step optional if you’re not one to overshare.
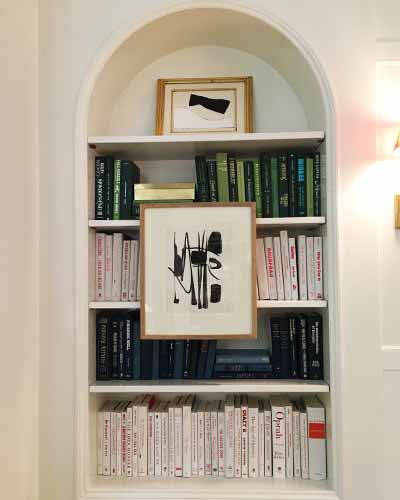
Image: Taken at Kips Bay Decorator Show House 2019
Another trend that’s huge right now (and has been for a little while): instead of layering artwork behind shelved items, display it at the forefront.
At Kips Bay Decorator Show House 2019 in Manhattan, this was done all over the place! It’s a different approach to shelf styling that focuses more on the art or framed-picture than the books or items on the shelf. Miss Mustard Seed gets into the details on how to do this in her blog post about hanging art on a bookcase. We love this unique way to display and highlight your favourite pieces of art!
Tip 5: Don't forget to add items you love

Once you have the base layout of large pieces, books and artwork, you can start adding in smaller objects and hits of greenery. Most of us have a collection of “things” we love and don’t want to part with, and open shelves are the perfect place to display them.
Whether it’s a fun find from HomeSense or a garage sale, a piece of driftwood that brings back summer memories or a treasured memento from a special getaway, you’ll find homes for each one atop the stacks of books, on a tray or simply wherever it fits. Doesn’t it feel good to bring it all together?
Tip 6: Take a step back
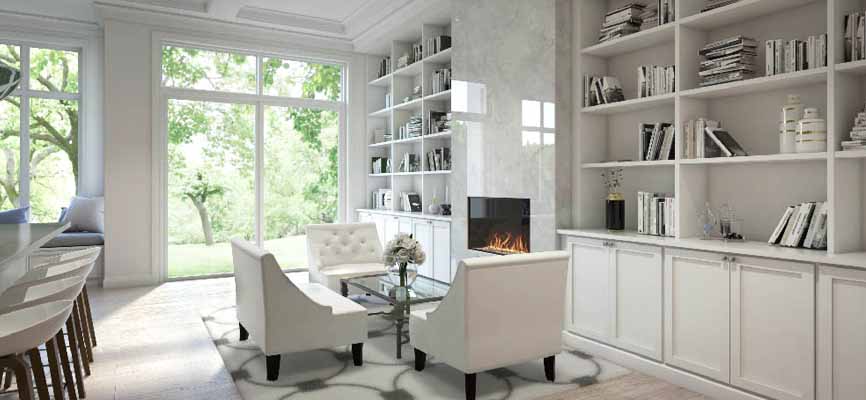
Image: Fitzsimmon model at Glen Agar in Etobicoke, by Minto Communities
Last but not least, take another step back and tinker and tweak until everything feels balanced and tells the story you want it to tell. Remove anything that feels too heavy, shift angles and maybe even add a succulent or other small plant. The great thing about styling your shelves is that nothing has to be permanent. Think of it as a fluid installment, a reflection of your current mood, style and tastes and a way to have fun with your décor.
If you sleep on it and wake up tomorrow morning with fresh eyes, you may feel compelled to move a few things – or who knows? Maybe you’ll start from scratch. Because while there are basics of design to guide you, it’s really your heart you should follow.