How to hang a damage-free gallery wall in your apartment
Gallery walls are fun, expressive and make a trendy statement – but can you create one if you rent an apartment? Absolutely.
It’s an ideal décor feature for a small apartment. But where do you hang a gallery wall? Here are some ideas:
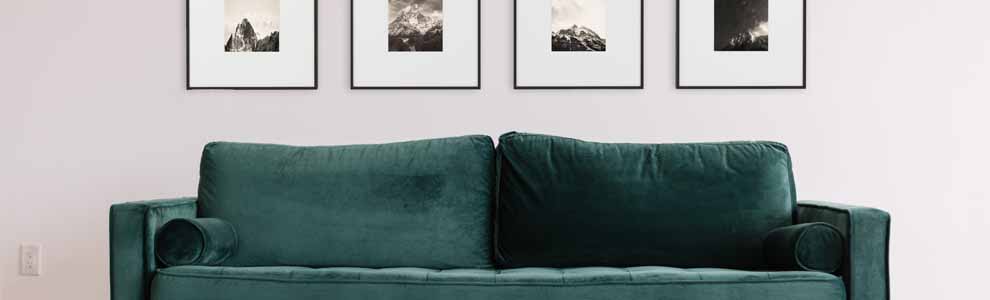
• Above your sofa or bed
• Around your TV (use “the focal point” style where the TV is your focal point! See below for details)
• Along a hallway
• Going up a staircase
• Above your toilet (why not?)
• On the small wall at the end of your galley kitchen
• On your fridge (with magnets, so simple!)
• Around a window or door
• Any empty wall in your apartment
Before you grab a hammer and nails (even if your rental company allows holes in walls), we’re going to give you some helpful tips on creating this temporary (and affordable) décor look for your apartment.
How to plan the perfect gallery wall

Photo by Jason Briscoe on Unsplash
When it comes to creating a gallery wall, you’ll first want to research and plan for the look you want.
First, choose what type suits your style. Here are seven artful options, thanks to One Kings Lane:
1. The grid: To create this look, use frames that are the same size and colour – it’s all about symmetry. Look for images with similar colours and design, and hang the frames all perfectly straight, just like a grid!
2. The top-down: Start at the top of your wall, creating a straight alignment of frames, and then mismatch and hang randomly as you work your way down the wall. Just make sure you keep the same distance from the bottom of one frame to the top of the next for a unified, yet free look.
3. The focal point: This type is centred around one big piece – the focal point. Whether it’s art, a mirror or a photograph, centre it horizontally on the wall and arrange the smaller pieces around it.
4. The mix: This is really about mixing and matching – no matter the shape, frame colour or type of art. The pieces can be any distance apart and the images don’t need to match in colour. No rules with this one!
5. The match: Different sized frames? No problem. However with this type of gallery wall, make sure every frame is the same colour for a sense of uniformity, and then go wild with layout.
6. The common theme: This is about ensuring the content inside the frames sticks to one major theme. Love dogs? Fashion? Perfect. Grab different frames, keep the style and theme of the art the same, and voila!
7. The floor-to-ceiling: The layout is optional, so this means you’re going to fill an entire wall from floor to ceiling. Use any of the above styles based on what you like and do your thing.

Photo by Jonathan Borba on Unsplash
Next, pick and choose what to use. Think framed art, canvas, photographs, magazine covers, drawings, maps and postcards, mirrors, fabric, or a mix of all the above (depending on the layout you pick).
• Insider tip #1: Instead of jumping on your computer to order a bunch of new pieces, hit up thrift stores, your family’s houses (check out their stashes of old magazines and photos!), garage sales, or just get crafty and create your own artwork.
• Insider tip #2: When you’re choosing pieces, think light. Because what you’re creating is temporary, you’re not using nails to hang it – meaning the less it weighs, the easier it will be to hang (and stay put!).
Once you have the pieces, spread them out on the floor to make sure the style you chose works with what you have. Then, decide where to hang it and gather your tools together.
• Another tip: After you arrange the layout on the floor, measure the total height and width of it all together (roughly), to ensure it’ll fit on the wall you pick. There’s nothing worse than being halfway done and realizing you’ve run out of wall space!
The tools you need to create a gallery wall (with no holes)

First thing’s first, you’re going to need a measuring tape and a level (or a level app for your phone).
• No matter what layout type you’ve chosen, you’ll want to ensure the frames are hanging straight, otherwise it may look messy when it’s done.
Given you’re looking to create a temporary gallery wall (with no wall holes), here are some materials to use to actually hang the frames:
• 3M hooks: The blogging world swears by these! Use two or four, small or large hooks depending on the piece’s size and weight – they stick on the wall like nobody’s business.
• Command strips: Whether small or large, these will ensure a damage-free wall for your apartment. They stick to the wall and don’t leave residue, just make sure you research how much weight they can hold (and use more than one so nothing falls).
• Washi tape: If you’re using prints or photos without frames, hang them with some fun washi tape. Whether you use a bit on the top, four corners, or frame it all around, it’s quick, easy and affordable!
Optional materials you may need to create your gallery wall include:
• Newspaper or paper (see the below “Let’s hang, shall we?” section for why)
• Pen/pencil
• Tape
• Scissors
Measuring your way to success

Photo by H Wong on Unsplash
Proper measurements are critical – first for ensuring that all pieces will fit on the chosen wall, secondly so that it looks unified, even if it’s a mixed style.
A Pretty Fix gives us two important measuring tips when it comes to the design:
1. The lowest point of any print or artwork should be about 6-12 inches above any piece of furniture it’s hung over.
2. To ensure each piece in your gallery wall feels connected to the other, hang the pieces no more than 2-4 inches apart from each other.
How to ensure even spacing?
• Of course, you can use a measuring tape. But if you’re looking for something a bit simpler, use a book spine or ruler to ensure even distance between the pieces.
Let’s hang, shall we?

Photo by heather bozman from Pexels
Likely the scariest part of it all – hanging the pieces to the walls. We have some foolproof tips to make this a breeze, so don’t fret.
A great tip before hanging your frames from NY Times:
• Before you start hanging, outline all of your items on paper (or newspaper), cut them out and then “label them and stick the cutout paper shapes on the wall”. Then you can simply hang the real piece in the paper’s place, ensuring it ends up in the right spot on the wall.
o If you go with this approach, you’ll need paper (or newspaper), a pen, tape and some scissors.

Photo by NATHAN MULLET on Unsplash
A key tip to help ensure your piece is level:
• Hanging at the same time as holding a level can be tricky! Use a level above your piece of paper before you hang the real piece and draw a straight line lightly using a pencil. Then, add your sticky strips and hang your frame right on or above the line – done!
o Pencil can easily be erased off a wall and your frame will cover it anyways. It’s less permanent than a hole in the wall, that’s for sure!
Next, remember that it’s not permanent and you can always add to it, and then step back and enjoy it! Practice makes perfect, so if you don’t get it right the first time, our advice is to try, try again.